
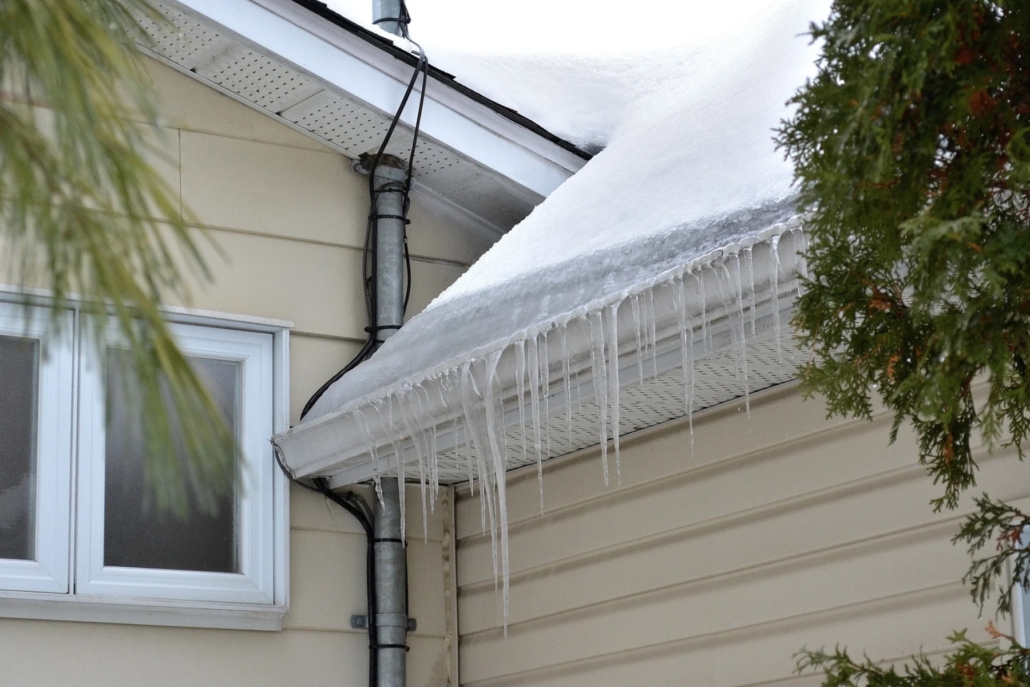
Preventing Ice Dams: A Homeowner’s Guide to Protecting Your Roof This Winter
Winter brings scenic snowfalls, but it can also usher in one of the most destructive cold-weather issues a homeowner can face: ice dams. Left unaddressed, ice dams force melting snow back under roof shingles, leading to stained drywall, ruined insulation, rotted roof sheathing, and costly interior repairs.
Understanding how ice dams form—and taking targeted preventive measures—can save thousands of dollars in water damage repairs.
What Causes an Ice Dam?
An ice dam isn’t just a gutter problem—it’s an attic thermal performance problem. Ice dams occur when a significant temperature difference exists between the main roof surface and the unheated eaves.
- Heat Escalation: Warm air leaks from the living space into the attic, heating the underside of the roof deck above freezing.
- Melting Snow: Snow on the upper roof melts and trickles down toward the eaves.
- Refreezing at the Overhang: When the meltwater reaches the cold overhang (which extends past the exterior wall and remains at freezing temperature), it refreezes, forming a ridge of ice.
- Water Back-up: As snow continues to melt, water pools behind the ice ridge. Unable to drain into the gutters, the standing water gets pushed up underneath the shingles and works its way into the home.
De-Icing Heat Cables vs. Permanent Attic Fixes
When facing recurrent ice dams, homeowners often choose between a quick exterior attachment—electric de-icing heat cables—and a full interior retrofit of attic air sealing and insulation. While both aim to prevent water backup, they work on fundamentally different principles.
De-Icing Heat Cables (The Band-Aid Approach)
De-icing cables (zigzag electric heating wires installed along the eaves and gutters) do not stop ice dams from forming. Instead, they melt narrow drainage channels through the ice so trapped water can flow off the roof.
- Pros: Lower upfront initial cost; can be retrofitted on complex rooflines or historic homes where attic access is severely restricted; offers an immediate emergency relief valve.
- Cons: Ongoing electrical operating costs throughout winter; cables degrade over time under UV and weather exposure (typically lasting 3 to 5 years); does not address the underlying energy loss; can look visually distracting along eaves.
Permanent Air Sealing & Insulation (The Root-Cause Solution)
Fixing the thermal envelope directly prevents the conditions that create ice dams by keeping house heat out of the attic.
- Pros: Eliminates ice dams at the source; reduces monthly winter heating and summer cooling utility bills; improves overall interior comfort; lasts the lifetime of the home without ongoing maintenance costs.
- Cons: Higher initial upfront labor/material cost; requires accessing attic spaces; may require professional air-sealing and insulation contractors.
| Feature | De-Icing Heat Cables | Permanent Air Sealing & Insulation
| Primary Function | Melts channels through ice dams | Prevents snow from melting on the roof
| Upfront Cost | Low to Moderate | Moderate to High
| Ongoing Operating Cost | Increases electric bill | Decreases monthly heating/cooling bills
| Longevity | 3–5 years average lifespan | Permanent (lifetime of structure)
| Energy Efficiency | Consumes energy | Conserves energy
4 Keys to Long-Term Ice Dam Prevention
To permanently eliminate ice dams, the roof needs to maintain a uniform, cold temperature across its entire surface.
1. Seal Air Leaks Into the Attic
The most critical step is stopping warm house air from entering the attic space (known as bypasses).
- Seal gaps around recessed light fixtures, plumbing stacks, attic access hatches, and chimney chases.
- Use expanding foam, caulk, or rigid foam board around ceiling penetrations before adding insulation.
2. Upgrade Attic Insulation Depth
Insulation slows heat conduction from your living space to the roof deck.
- Ensure insulation meets or exceeds regional recommendations (typically R-49 to R-60 in northern climates, or roughly 16 to 20 inches of loose-fill fiberglass/cellulose).
- Maintain a continuous thermal boundary without gaps or compressed insulation.
3. Ensure Adequate Attic Ventilation
Proper airflow pulls in cold outdoor air and flushes out residual heat.
- Combine continuous soffit vents (intake) with a ridge vent (exhaust) to create balanced airflow beneath the roof deck.
- Install vent baffles (soffit chutes) at the eaves to keep insulation from blocking air intake paths.
4. Install Ice & Water Shield During Roof Replacement
When re-roofing, install a self-adhering polymer-modified bitumen membrane (Ice & Water Shield) along all eaves.
- Extend the membrane at least 24 inches inside the exterior wall line (and in all valleys) to serve as a waterproof barrier if ice damming ever does occur.
Immediate Emergency Steps
If an ice dam has already formed and water is infiltrating the home:
- Rake the Snow: Use a telescoping roof rake from the ground to safely remove 3 to 4 feet of snow from the roof edge, cutting off the water supply feeding the dam.
- Avoid Harsh Impact: Never use a hammer, hatchet, or shovel to chip away ice on the roof; doing so frequently destroys shingles and gutters.
- Use Calcium Chloride: If necessary, place calcium chloride ice melt in a nylon sock across the ice dam to melt a channel for trapped water to drain out. Never use rock salt (sodium chloride), which corrodes metal fasteners and damages shingles.
Leave a Reply
Want to join the discussion?Feel free to contribute!